 在 TensorFlow.org 上查看 在 TensorFlow.org 上查看 |
 在 Google Colab 中运行 在 Google Colab 中运行 |
 在 GitHub 上查看源代码 在 GitHub 上查看源代码 |
 下载笔记本 下载笔记本 |
此笔记本演示了如何基于 MNIST 数据集训练变分自编码器 (VAE) (1, 2)。VAE 是一种自编码器取值的概率分布,该模型会获取高维输入数据并将其压缩为较小的表示。与将输入映射到隐向量的传统自编码器不同,VAE 会将输入数据映射到概率分布的参数中,例如高斯分布的均值和方差。这种方式可以生成一个连续、结构化的隐空间,对于图像生成而言十分适用。

导入 Tensorflow 与其他库
pip install tensorflow-probability# to generate gifspip install imageiopip install git+https://github.com/tensorflow/docs
from IPython import display

import glob
import imageio
import matplotlib.pyplot as plt
import numpy as np
import PIL
import tensorflow as tf
import tensorflow_probability as tfp
import time
2023-11-07 19:07:43.934263: E external/local_xla/xla/stream_executor/cuda/cuda_dnn.cc:9261] Unable to register cuDNN factory: Attempting to register factory for plugin cuDNN when one has already been registered
2023-11-07 19:07:43.934314: E external/local_xla/xla/stream_executor/cuda/cuda_fft.cc:607] Unable to register cuFFT factory: Attempting to register factory for plugin cuFFT when one has already been registered
2023-11-07 19:07:43.935832: E external/local_xla/xla/stream_executor/cuda/cuda_blas.cc:1515] Unable to register cuBLAS factory: Attempting to register factory for plugin cuBLAS when one has already been registered
加载 MNIST 数据集
每个 MNIST 图像最初都是一个由 784 个整数组成的向量,每个整数在 0-255 之间,代表一个像素的强度。在我们的模型中使用伯努利分布对每个像素进行建模,并对数据集进行静态二值化。
(train_images, _), (test_images, _) = tf.keras.datasets.mnist.load_data()
Downloading data from https://storage.googleapis.com/tensorflow/tf-keras-datasets/mnist.npz
11490434/11490434 [==============================] - 0s 0us/step
def preprocess_images(images):
  images = images.reshape((images.shape[0], 28, 28, 1)) / 255.
  return np.where(images > .5, 1.0, 0.0).astype('float32')

train_images = preprocess_images(train_images)
test_images = preprocess_images(test_images)
train_size = 60000
batch_size = 32
test_size = 10000
使用 tf.data 来将数据分批和打乱
train_dataset = (tf.data.Dataset.from_tensor_slices(train_images)
                 .shuffle(train_size).batch(batch_size))
test_dataset = (tf.data.Dataset.from_tensor_slices(test_images)
                .shuffle(test_size).batch(batch_size))
通过 tf.keras.Sequential 连接生成网络与推理网络
在此 VAE 示例中,对编码器和解码器网络使用两个小型 ConvNet。在文献中,这些网络也分别称为推断/识别和生成模型。使用 tf.keras.Sequential 来简化实现。在下面的描述中,使 \(x\) 和 \(z\) 分别表示观测值和隐变量。
生成网络
这定义了近似后验分布 \(q(z|x)\),它会将输入取作观测值并输出一组参数,用于指定隐变量表示 \(z\) 的条件分布。在本例中,简单地将分布建模为对角高斯分布,网络会输出分解高斯分布的均值和对数方差参数。输出对数方差而不是直接用于数值稳定性的方差。
推理网络
这定义了观测值的条件分布 \(p(x|z)\),它会将隐变量样本 \(z\) 取作输入并输出观测值条件分布的参数。将隐变量先验分布 \(p(z)\) 建模为单位高斯分布。
重参数化技巧
要在训练期间为解码器生成样本 \(z\),您可以在给定输入观测值 \(x\) 的情况下从编码器输出的参数所定义的隐变量分布中采样。然而,这种采样操作会产生瓶颈,因为反向传播不能流经随机节点。
要解决这个问题,请使用重参数化技巧。在我们的示例中,使用解码器参数和另一个参数 \(\epsilon\) 来逼近 \(z\),如下所示:
\[z = \mu + \sigma \odot \epsilon\]
其中 \(\mu\) 和 \(\sigma\) 分别代表高斯分布的均值和标准差。它们可通过解码器输出推导得出。\(\epsilon\) 可被认为是用于保持 \(z\) 的随机性的随机噪声。从标准正态分布生成 \(\epsilon\)。
隐变量 \(z\) 现在由 \(\mu\)、\(\sigma\) 和 \(\epsilon\) 的函数生成,这将使模型能够分别通过 \(\mu\) 和 \(\sigma\) 在编码器中反向传播梯度,同时通过 \(\epsilon\) 保持随机性。
网络架构
对于编码器网络,使用两个卷积层后接一个全连接层。在解码器网络中,通过使用一个全连接层后接三个卷积转置层(在某些背景下也称为反卷积层)来镜像此架构。请注意,通常的做法是在训练 VAE 时避免使用批量归一化,因为使用 mini-batch 导致的额外随机性可能会在提高采样随机性的同时加剧不稳定性。
class CVAE(tf.keras.Model):
  """Convolutional variational autoencoder."""

  def __init__(self, latent_dim):
    super(CVAE, self).__init__()
    self.latent_dim = latent_dim
    self.encoder = tf.keras.Sequential(
        [
            tf.keras.layers.InputLayer(input_shape=(28, 28, 1)),
            tf.keras.layers.Conv2D(
                filters=32, kernel_size=3, strides=(2, 2), activation='relu'),
            tf.keras.layers.Conv2D(
                filters=64, kernel_size=3, strides=(2, 2), activation='relu'),
            tf.keras.layers.Flatten(),
            # No activation
            tf.keras.layers.Dense(latent_dim + latent_dim),
        ]
    )

    self.decoder = tf.keras.Sequential(
        [
            tf.keras.layers.InputLayer(input_shape=(latent_dim,)),
            tf.keras.layers.Dense(units=7*7*32, activation=tf.nn.relu),
            tf.keras.layers.Reshape(target_shape=(7, 7, 32)),
            tf.keras.layers.Conv2DTranspose(
                filters=64, kernel_size=3, strides=2, padding='same',
                activation='relu'),
            tf.keras.layers.Conv2DTranspose(
                filters=32, kernel_size=3, strides=2, padding='same',
                activation='relu'),
            # No activation
            tf.keras.layers.Conv2DTranspose(
                filters=1, kernel_size=3, strides=1, padding='same'),
        ]
    )

  @tf.function
  def sample(self, eps=None):
    if eps is None:
      eps = tf.random.normal(shape=(100, self.latent_dim))
    return self.decode(eps, apply_sigmoid=True)

  def encode(self, x):
    mean, logvar = tf.split(self.encoder(x), num_or_size_splits=2, axis=1)
    return mean, logvar

  def reparameterize(self, mean, logvar):
    eps = tf.random.normal(shape=mean.shape)
    return eps * tf.exp(logvar * .5) + mean

  def decode(self, z, apply_sigmoid=False):
    logits = self.decoder(z)
    if apply_sigmoid:
      probs = tf.sigmoid(logits)
      return probs
    return logits
定义损失函数和优化器
VAE 通过最大化边际对数似然的证据下界(ELBO)进行训练:
\[\log p(x) \ge \text{ELBO} = \mathbb{E}_{q(z|x)}\left[\log \frac{p(x, z)}{q(z|x)}\right].\]
在实践中,优化此期望的单样本蒙特卡罗估值:
\(\log p(x| z) + \log p(z) - \log q(z|x)\),其中 \(z\) 从 \(q(z|x)\) 中采样。
注:您也可以分析计算 KL 项,但为了简单起见,您在此处会将三个项全部应用到蒙特卡罗 Estimator 中。
optimizer = tf.keras.optimizers.Adam(1e-4)


def log_normal_pdf(sample, mean, logvar, raxis=1):
  log2pi = tf.math.log(2. * np.pi)
  return tf.reduce_sum(
      -.5 * ((sample - mean) ** 2. * tf.exp(-logvar) + logvar + log2pi),
      axis=raxis)


def compute_loss(model, x):
  mean, logvar = model.encode(x)
  z = model.reparameterize(mean, logvar)
  x_logit = model.decode(z)
  cross_ent = tf.nn.sigmoid_cross_entropy_with_logits(logits=x_logit, labels=x)
  logpx_z = -tf.reduce_sum(cross_ent, axis=[1, 2, 3])
  logpz = log_normal_pdf(z, 0., 0.)
  logqz_x = log_normal_pdf(z, mean, logvar)
  return -tf.reduce_mean(logpx_z + logpz - logqz_x)


@tf.function
def train_step(model, x, optimizer):
  """Executes one training step and returns the loss.

  This function computes the loss and gradients, and uses the latter to
  update the model's parameters.
  """
  with tf.GradientTape() as tape:
    loss = compute_loss(model, x)
  gradients = tape.gradient(loss, model.trainable_variables)
  optimizer.apply_gradients(zip(gradients, model.trainable_variables))
训练
- 首先迭代数据集
- 在每次迭代期间,将图像传递给编码器以获取近似后验分布 \(q(z|x)\) 的一组均值和对数方差参数
- 然后,应用重参数化技巧以从 \(q(z|x)\) 中采样
- 最后,将重参数化的样本传递给解码器以获取生成分布 \(p(x|z)\) 的 logit
- 注:由于您使用由 Keras 加载的数据集,训练集中有 6 万个数据点,测试集中有 1 万个数据点,因此我们基于测试集得出的 ELBO 会略高于使用 Larochelle 的 MNIST 动态二值化的文献中报告的结果。
生成图像
- 进行训练后,可以生成一些图片了
- 首先从单位高斯先验分布 \(p(z)\) 中采样一组隐向量
- 随后生成器将潜在样本 \(z\) 转换为观测值的 logit,得到分布 \(p(x|z)\)
- 在此处,绘制伯努利分布的概率分布图
epochs = 10
# set the dimensionality of the latent space to a plane for visualization later
latent_dim = 2
num_examples_to_generate = 16

# keeping the random vector constant for generation (prediction) so
# it will be easier to see the improvement.
random_vector_for_generation = tf.random.normal(
    shape=[num_examples_to_generate, latent_dim])
model = CVAE(latent_dim)
def generate_and_save_images(model, epoch, test_sample):
  mean, logvar = model.encode(test_sample)
  z = model.reparameterize(mean, logvar)
  predictions = model.sample(z)
  fig = plt.figure(figsize=(4, 4))

  for i in range(predictions.shape[0]):
    plt.subplot(4, 4, i + 1)
    plt.imshow(predictions[i, :, :, 0], cmap='gray')
    plt.axis('off')

  # tight_layout minimizes the overlap between 2 sub-plots
  plt.savefig('image_at_epoch_{:04d}.png'.format(epoch))
  plt.show()
# Pick a sample of the test set for generating output images
assert batch_size >= num_examples_to_generate
for test_batch in test_dataset.take(1):
  test_sample = test_batch[0:num_examples_to_generate, :, :, :]
generate_and_save_images(model, 0, test_sample)

for epoch in range(1, epochs + 1):
  start_time = time.time()
  for train_x in train_dataset:
    train_step(model, train_x, optimizer)
  end_time = time.time()

  loss = tf.keras.metrics.Mean()
  for test_x in test_dataset:
    loss(compute_loss(model, test_x))
  elbo = -loss.result()
  display.clear_output(wait=False)
  print('Epoch: {}, Test set ELBO: {}, time elapse for current epoch: {}'
        .format(epoch, elbo, end_time - start_time))
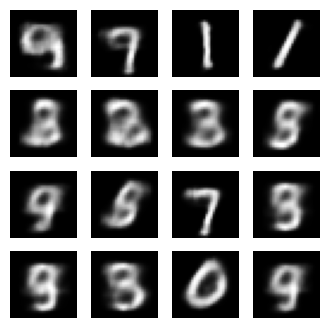
  generate_and_save_images(model, epoch, test_sample)
Epoch: 10, Test set ELBO: -157.28672790527344, time elapse for current epoch: 5.9023597240448

使用 epoch 编号显示图片
def display_image(epoch_no):
  return PIL.Image.open('image_at_epoch_{:04d}.png'.format(epoch_no))
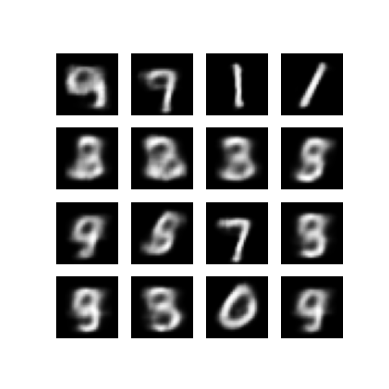
plt.imshow(display_image(epoch))
plt.axis('off')  # Display images
(-0.5, 399.5, 399.5, -0.5)

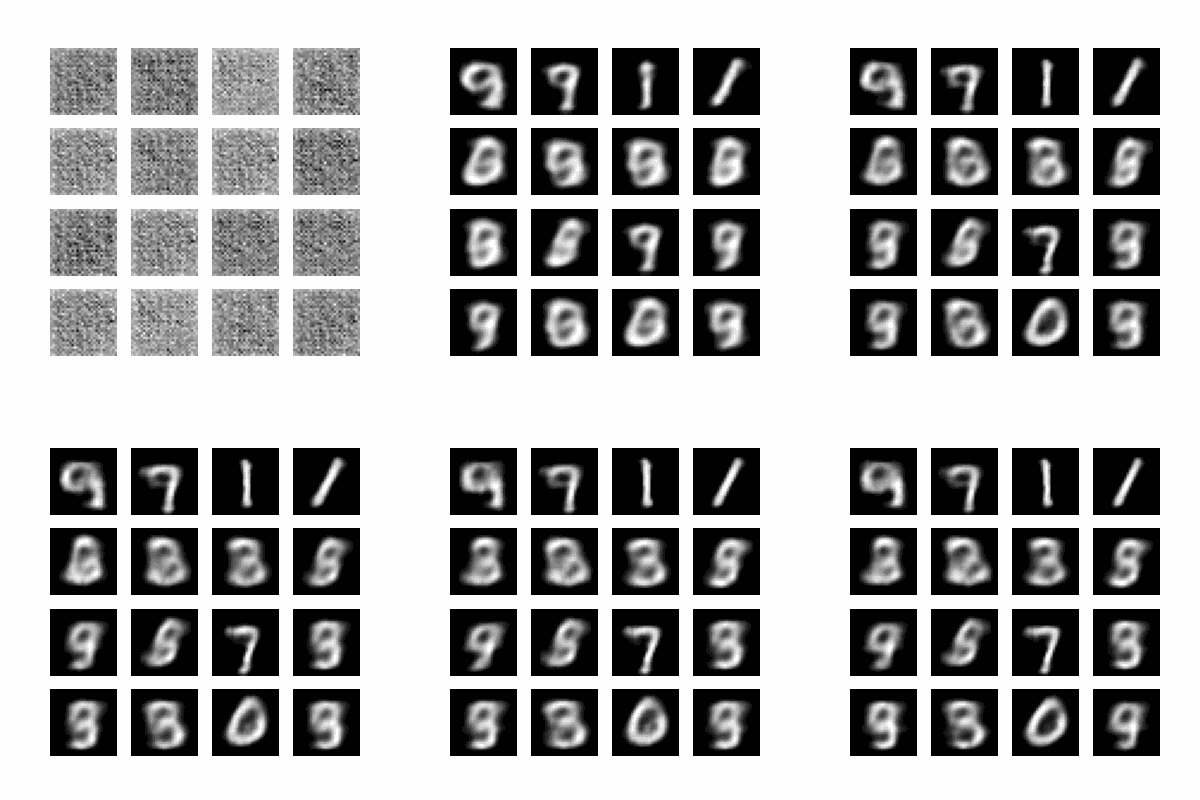
生成所有保存图片的 GIF
anim_file = 'cvae.gif'

with imageio.get_writer(anim_file, mode='I') as writer:
  filenames = glob.glob('image*.png')
  filenames = sorted(filenames)
  for filename in filenames:
    image = imageio.imread(filename)
    writer.append_data(image)
  image = imageio.imread(filename)
  writer.append_data(image)
/tmpfs/tmp/ipykernel_423837/1290275450.py:7: DeprecationWarning: Starting with ImageIO v3 the behavior of this function will switch to that of iio.v3.imread. To keep the current behavior (and make this warning disappear) use `import imageio.v2 as imageio` or call `imageio.v2.imread` directly.
  image = imageio.imread(filename)
/tmpfs/tmp/ipykernel_423837/1290275450.py:9: DeprecationWarning: Starting with ImageIO v3 the behavior of this function will switch to that of iio.v3.imread. To keep the current behavior (and make this warning disappear) use `import imageio.v2 as imageio` or call `imageio.v2.imread` directly.
  image = imageio.imread(filename)
import tensorflow_docs.vis.embed as embed
embed.embed_file(anim_file)

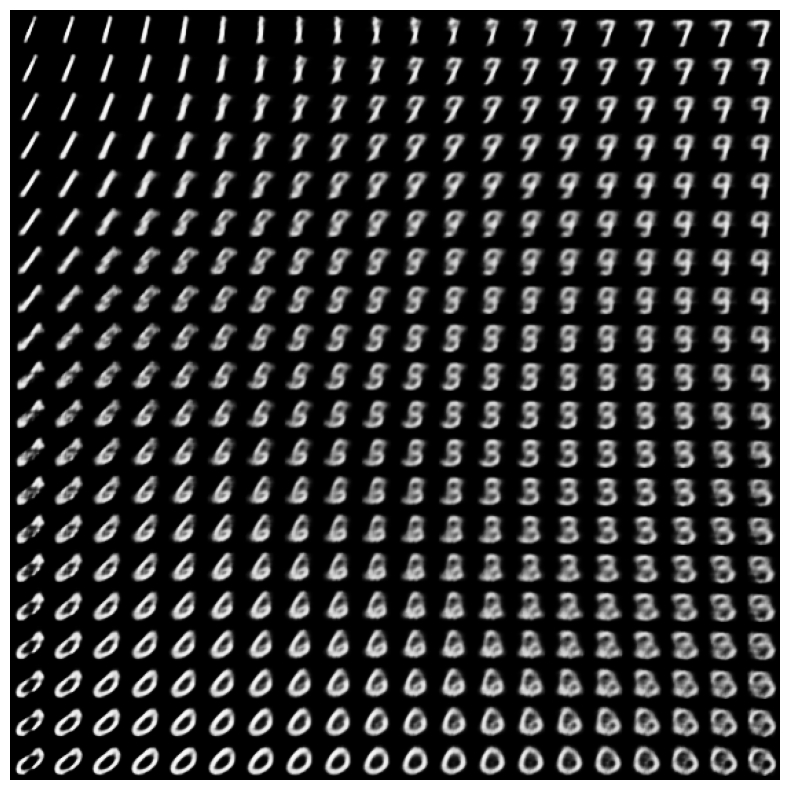
显示隐空间中数字的二维流形
运行下面的代码将显示不同数字类的连续分布,每个数字都会在二维隐空间中变形为另一数字。使用 TensorFlow Probability 为隐空间生成标准正态分布。
def plot_latent_images(model, n, digit_size=28):
  """Plots n x n digit images decoded from the latent space."""

  norm = tfp.distributions.Normal(0, 1)
  grid_x = norm.quantile(np.linspace(0.05, 0.95, n))
  grid_y = norm.quantile(np.linspace(0.05, 0.95, n))
  image_width = digit_size*n
  image_height = image_width
  image = np.zeros((image_height, image_width))

  for i, yi in enumerate(grid_x):
    for j, xi in enumerate(grid_y):
      z = np.array([[xi, yi]])
      x_decoded = model.sample(z)
      digit = tf.reshape(x_decoded[0], (digit_size, digit_size))
      image[i * digit_size: (i + 1) * digit_size,
            j * digit_size: (j + 1) * digit_size] = digit.numpy()

  plt.figure(figsize=(10, 10))
  plt.imshow(image, cmap='Greys_r')
  plt.axis('Off')
  plt.show()
plot_latent_images(model, 20)

后续步骤
本教程演示了使用 TensorFlow 实现卷积变分自编码器的方式。
下一步,您可以尝试通过增大网络来改进模型输出。例如,您可以尝试将每个 Conv2D 和 Conv2DTranspose 层的 filter 参数设置为 512。请注意,为了生成最终的二维隐空间图像,您需要将 latent_dim 保持为 2。此外,训练时间会随网络的增大而延长。
您还可以尝试使用不同的数据集实现 VAE,例如 CIFAR-10。
VAE 支持以多种不同的风格和不同的复杂性实现。您可以从以下资源中找到其他实现:
如果您想了解有关 VAE 的更多详细信息,请参阅变分自编码器简介。
